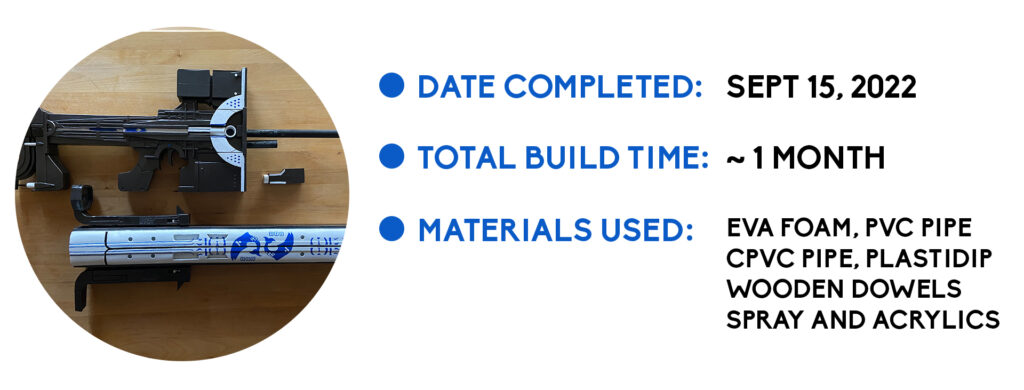
Izanagi’s Burden | Exotic Sniper Rifle
~ Destiny 2 ~
Pattern Designed and Built by ChriSekaiCosplay
Download the Pattern HERE!
About :
As an avid fan of Destiny 2 since Year One, and I realized that I didn’t have anything physical to show for it. So I decided to make a pattern for one of my favorite weapons, and then I thought why not? Might as well build it, too!
The Process :
Most of my progress pictures were saved from Instagram stories, please excuse any strange formatting!
I started by printing out my pattern and tracing it onto 10mm EVA foam.
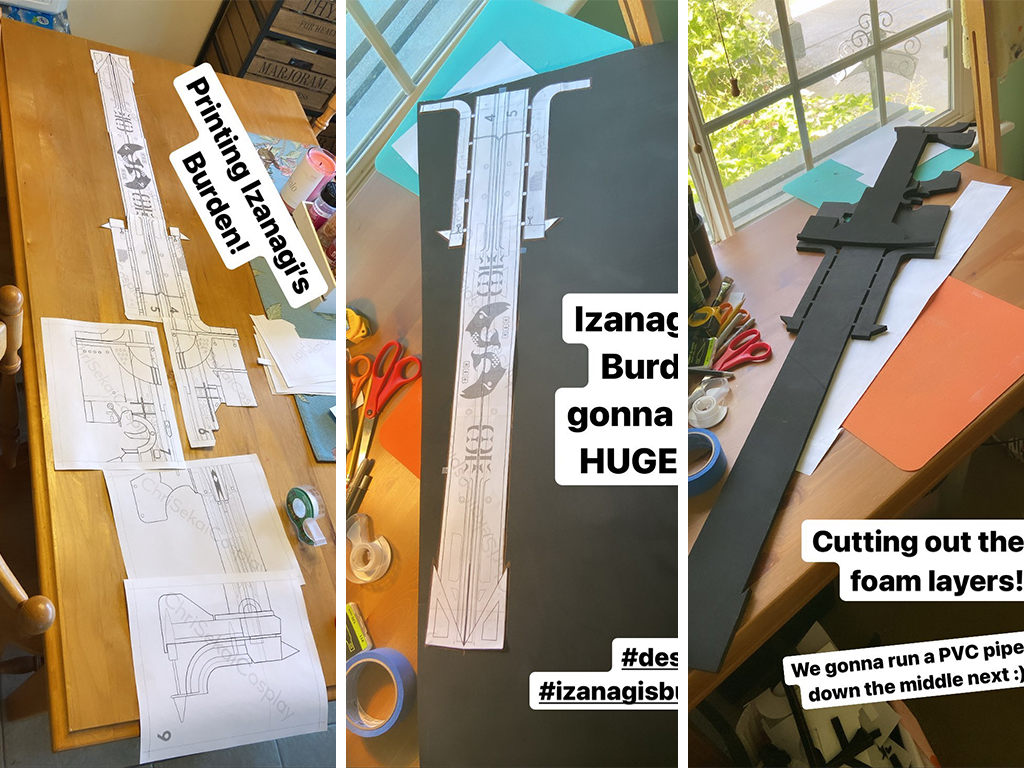
In order to give the long rifle barrel more support, I wanted to run a PVC pipe down the middle. Layers were cut from the foam and sandwiched around my pipe base. I wanted the rifle to detach where the long barrel meets the main body, so I made sure to build it as two separate pieces.
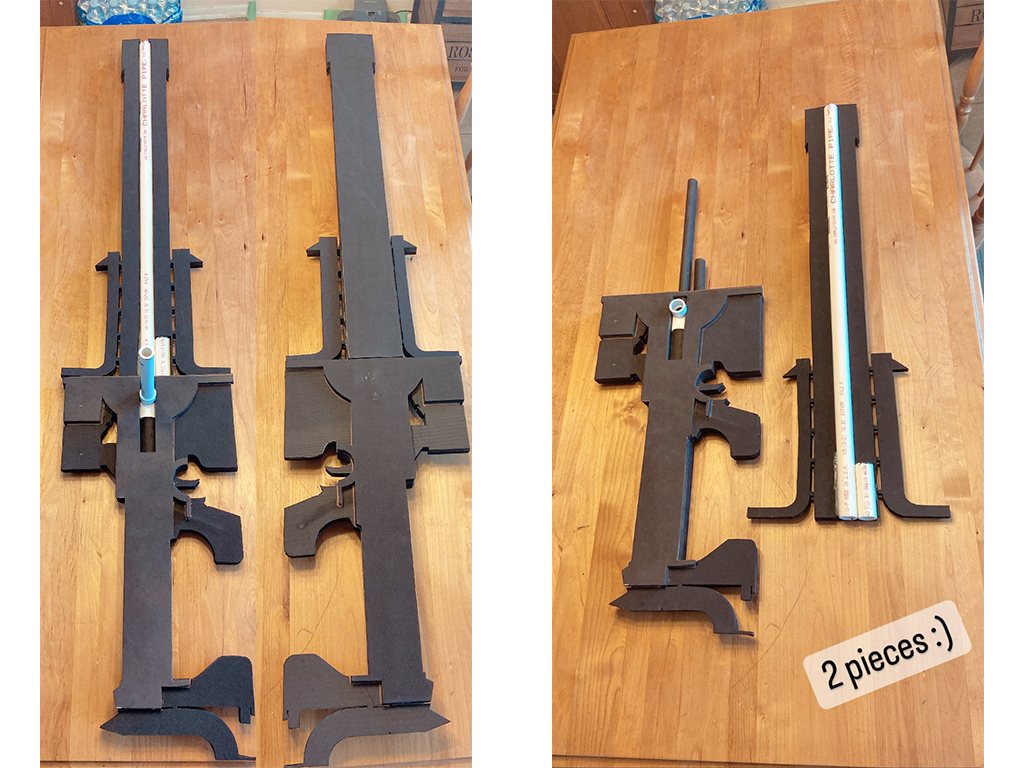
I used a 3/4″ PVC pipe for this build, along with 3/4″ CPVC pipe inside. The CPVC, with a little foam padding, fits snugly inside the PVC, and allows for a simple, no-locks-or-magnets method to slide two pieces together and have them hold securely!
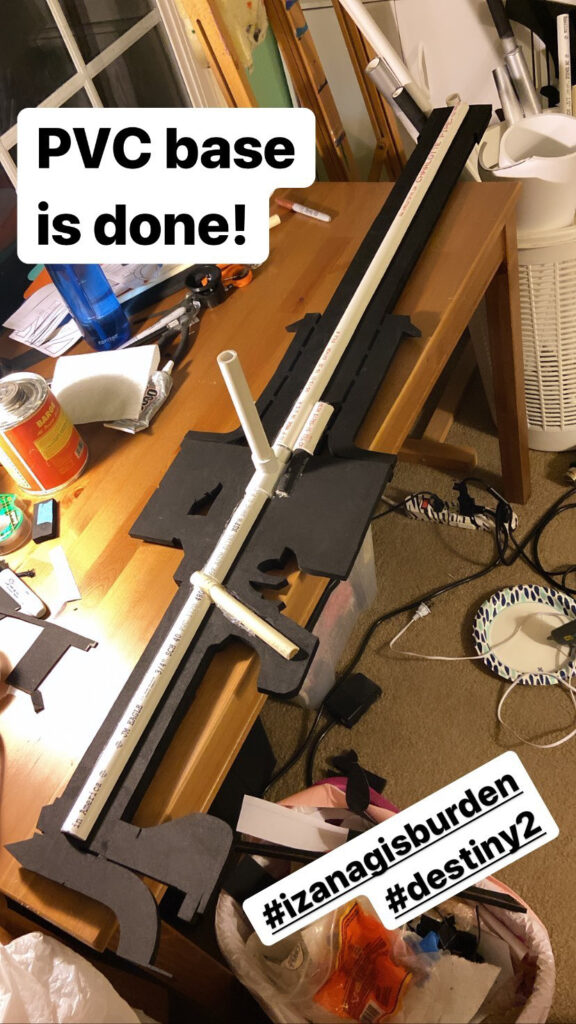
One 3/4″ PVC pipe runs the length of the rifle, a second, short 3/4″ PVC pipe sits at the separation point to keep the rifle upright and positioned correctly, and a 1/2″ PVC pipe splits from the main pipe and provides support for the handle grip!
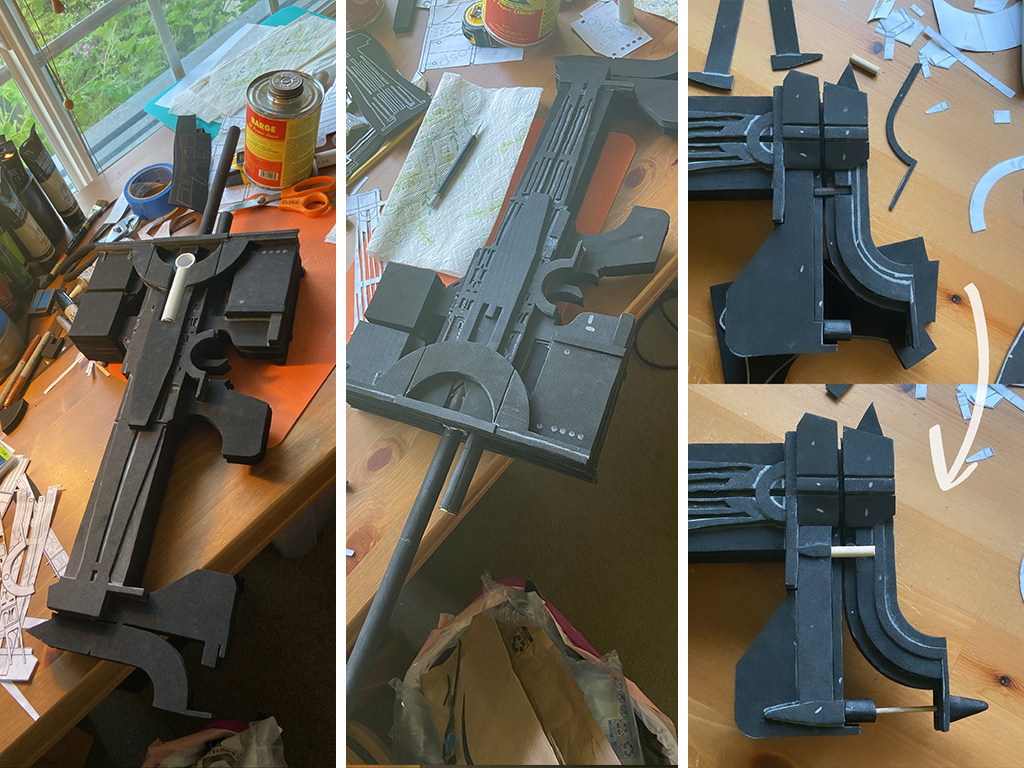
Knowing the main handle-piece would be the most time consuming, I decided to tackle that first! I cut my pattern up and created layer upon layer of 10mm, 5mm, and 2mm EVA foam detailing.
Edges were sanded smooth using a dremel and sandpaper, and small wooden dowels were used for some of the detail work on the end.
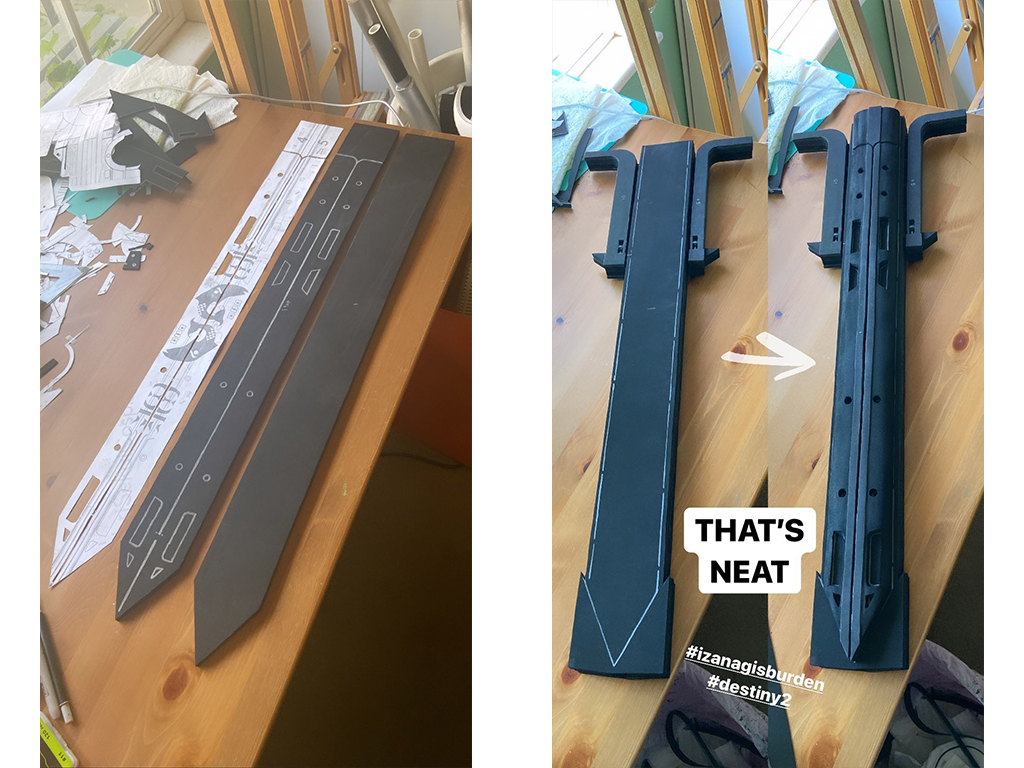
The barrel-piece of the rifle was much more straight-forward. I made a few layers of EVA foam to fully conceal the PVC pipe, then sanded and shaped the barrel to have a nice rounded edge!
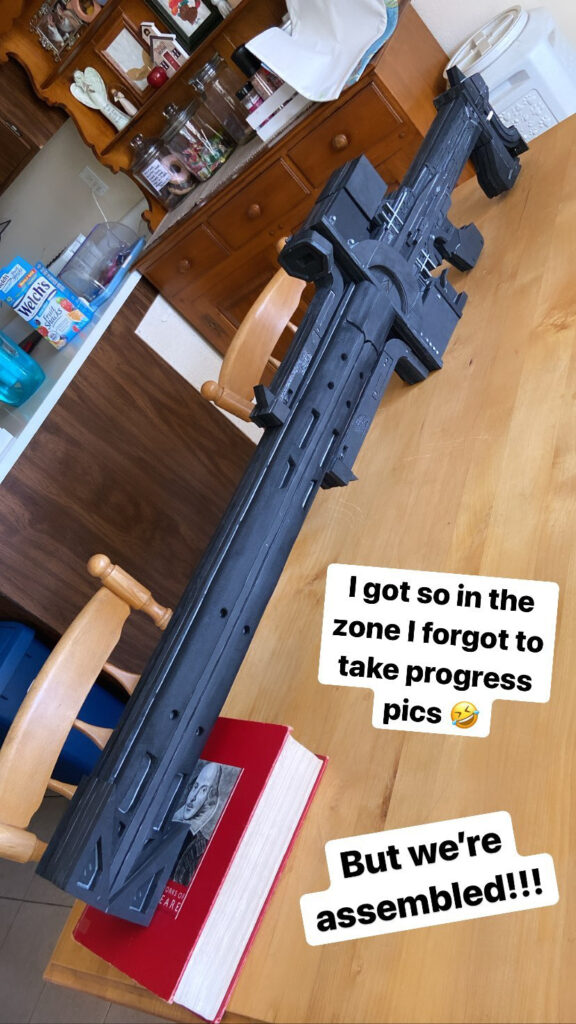
I forgot to take progress pics during this section, but I finished up the barrel-piece by creating a simple scope, built the end of the rifle barrel with layers of 10mm foam, and then sanded everything smooth!
Both pieces were then Plastidipped, primed with spray paint (black for the handle-piece, white for the barrel-piece), then details were hand painted using acrylics!
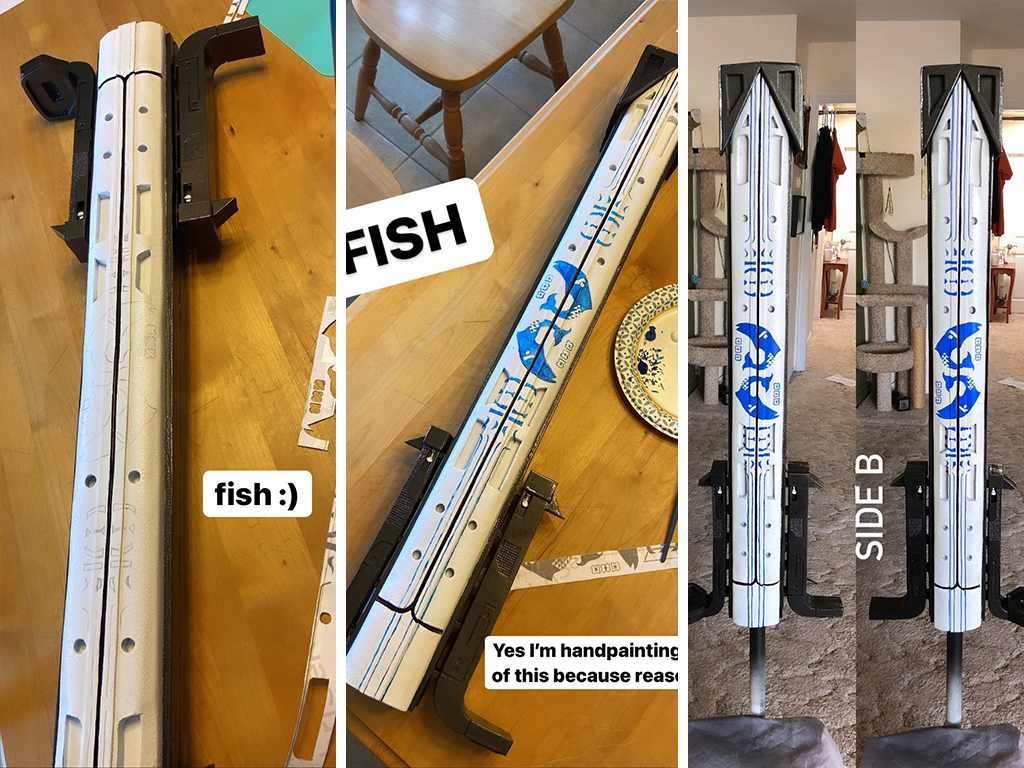
After a thick layer of glossy spray sealant, Izanagi’s Burden was completed! This project took roughly 235 hours (~1 month) from design to completion.
I think the end result was well worth the build time, don’t you? 😊
Download my Izanagi’s Burden pattern HERE!
Photo Gallery :
You can find more pics on my Instagram!